When you’re a new Mac user, especially if you’ve just moved from Windows where you frequently use the Prt Scrn (print screen) button, the answer to the question of how to take a screenshot on Mac is not immediately obvious.
You can use it with any modern Mac- including MacBook laptops, iMac all-in-ones or Mac Mini and Mac studio desktops. With MacBook keyboard shortcuts, you can take a screenshot in three different ways.
In addition to these tips, you can apply them to the newest Mac models as well, including the 13-inch MacBook Pro with a new M2 chip and the M2 MacBook Air.
Also Read: The Easiest Way To Hide Desktop Icons On Mac
| Keyboard shortcut | Function |
| Cmd-Shift-3 | Take a screenshot of your entire screen |
| Cmd-Shift-4 | You can screenshot any part of the screen by highlighting it |
| Cmd-Shift-5 | Record video from your screenshots or edit them using the screenshot menu |
| Cmd-Shift-6 | You can take a screenshot of the touch bar if your Mac has one |
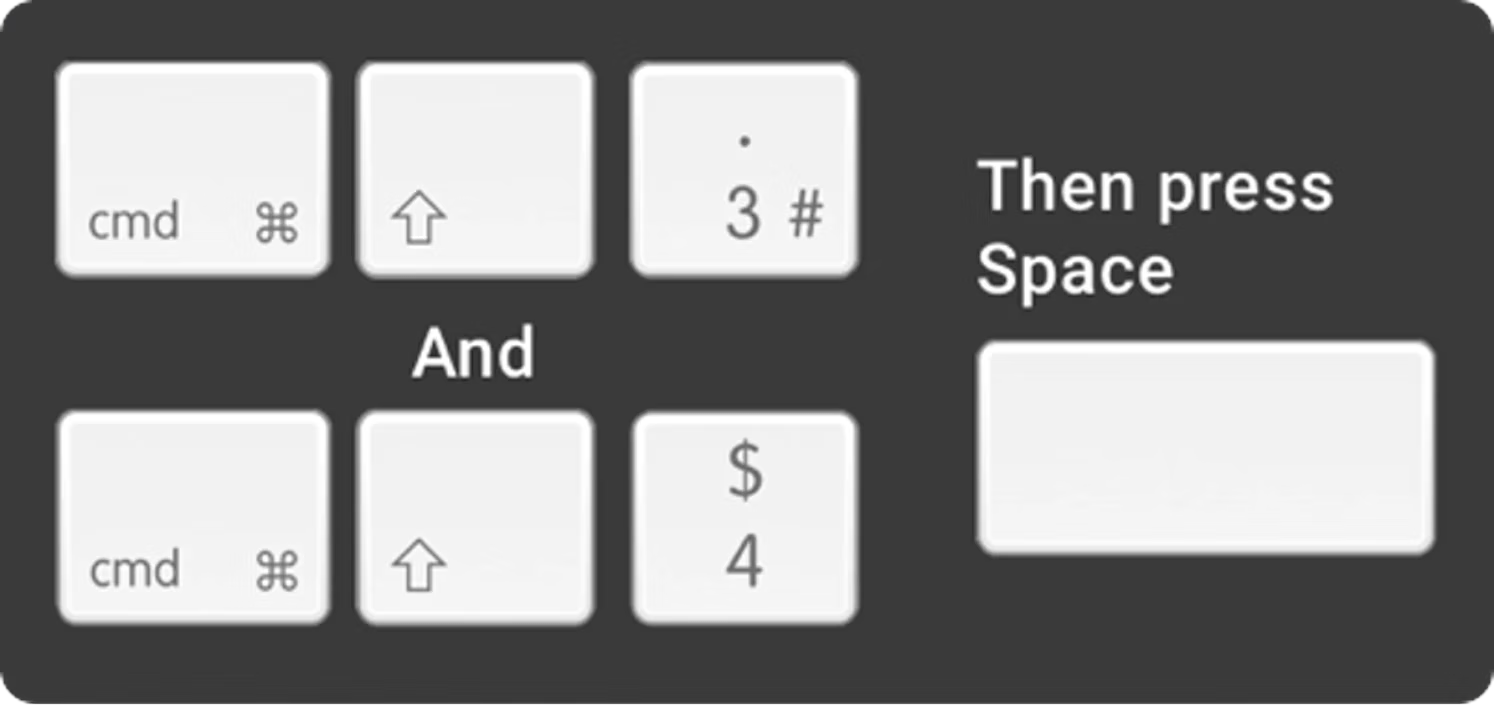
Method 1: Command-shift-3
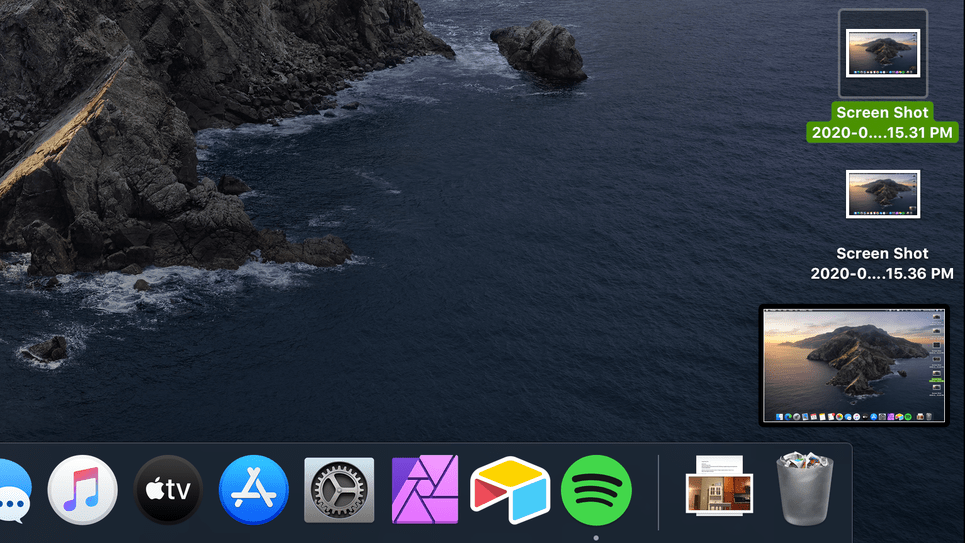
If you want to capture your entire screen, you should hold down shift+command+3 for a while. The bottom right corner of your MacBook screen will display a small thumbnail preview of the Mac screenshot, which you can click to edit. The Apple screenshot menu allows you to turn this feature on or off.
Note: You will be able to take and save screenshots from each monitor if you are using multiple monitors.
Method 2: Command-Shift-4
This MacBook keyboard combination turns your cursor into a crosshair, which you can drag to choose a portion of your screen to capture. To take a picture, release the mouse button or MacBook trackpad.
You have a number of other options after hitting Command+shift+4:
Press and release the spacebar:
You move the camera icon over any open window to turn the crosshair into a camera icon. You can take a screenshot of any window by clicking on it. A screenshot captured by this method has a white border around the window and a drop shadow.
Press and hold the spacebar:
By doing this, you lock the shape and size of the selection area, but you can move it around on the screen as needed. It’s an excellent tool for adjusting your initial selection area if it’s a few pixels off. To take a screenshot on Mac, hold down the spacebar and reposition it before releasing the mouse button.
Hold down the shift key:
As you move the mouse up or down to position the bottom edge, each side of the selection area made with the crosshairs will be locked in.
Reposition the right edge of your selection area by releasing the shift key and hitting it again without releasing the mouse button. When you press the shift key while holding down the mouse button on your MacBook or touchpad, you can toggle between moving the bottom edge and the right edge.
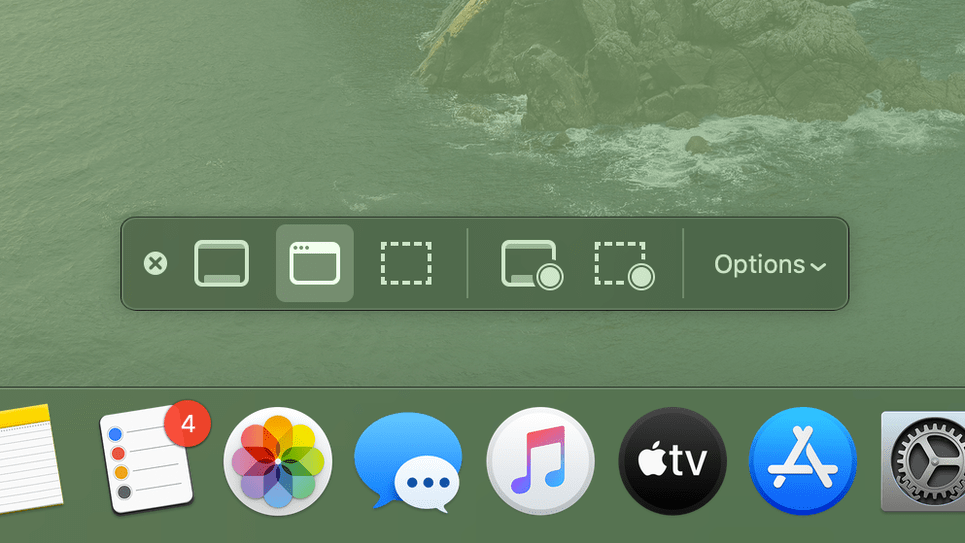
Method 3: Command-Shift-5
The Command+shift+5 shortcut command was introduced in macOS Mojave in 2018, and it displays a small panel with screen capture options at the bottom. You can take screenshots on Mac of your entire screen, a window, or a selection of your screen with three different screenshot buttons.
Additionally, you can record your entire screen or a selection of it using the two video recording buttons. The screenshot panel can be closed with the X button on the left, or you can simply hit the escape key to exit.
The right side of the screen has an options button. Your MacBook screenshot can be saved in a variety of locations. If you use your screenshot tool, you can line up items that may otherwise disappear when you engage your screenshot tool on your desktop, documents, clipboard, mail, message, preview or other location.
The option to show floating thumbnails is enabled by default. In the lower right corner of your screen, you will find a little preview thumbnail of the MacBook screenshot you just captured, similar to the screenshot procedure in iOS. The preview thumbnail on your Mac can be turned off, unlike on your iPhone. Last but not least, you can upload Mac screenshots or videos featuring your mouse pointer.
Method 4: Command-Shift-6(for Touch Bar MacBooks)
The Touch Bar is not available on all Mac computers, but if you have one, you can take a screenshot of it.
You can screenshot anything on your Touch Bar if you want to share it with others. Press Shift+command+6. As soon as you do this, everything on your Touch Bar will be captured.
![]()
You can see from the example above that screenshotting on a Mac is not particularly challenging. A dedicated MacBook screenshot and video capture menu in macOS makes it easier than ever to take screenshots and videos.
In the future, Apple is likely to make further improvements to the process as they understand the print screen Mac trouble for Windows switchers. In the comments section below, please let us know if you have any questions.